
Want to know what my latest obsession is? Geometric rugs!! I don’t know if you saw my rug round-up of rugs that go great on carpet where I mentioned a new line of rugs that I can’t get enough of. I added these rugs in my master bedroom and bonus room and just love how much they added to the space. Well, it was time to update my living room rug, so I decided to carry on the geometric pattern into this room as well! After getting it in there, I instantly fell in love with the texture, pattern, and warmth it added. I can’t wait to share with you how it looks plus share a few geometric area rug ideas for your home!

This geometric area rug is from Boutique Rugs and it’s called the Malilinao Area Rug and it’s absolutely stunning! This rug is cream and light beige with hints of light gray. As you can see, I mainly use these colors in my living room so it looked right at home with my neutral setting.

The oversized geometric shapes in this rug add a dramatic look that instantly makes this rug star of the show. The mix of woven and raised textures add warmth and dimension to my living room. I also will add that it is so very soft too!
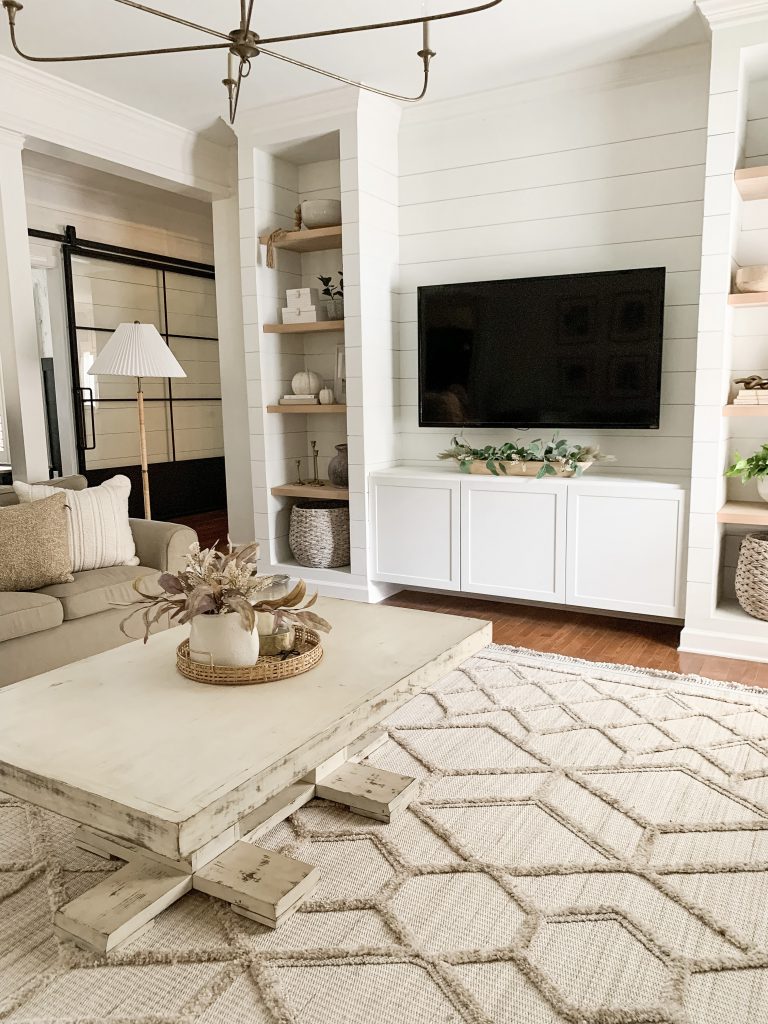
This neutral rug will blend in perfectly with not only neutral colors but bold colors as well. That is one reason you can never go wrong with a neutral rug. It literally goes with any color which makes this rug so versatile.

It also has this cute fringe detail on each side for a fun added touch!


The large geometric pattern makes such a gorgeous statement in this room!! Because I am officially obsessed, I decided to give you a few more of my geometric area rug favorites below. I hope you love them as much as I do!

Remember to use my code NESTHOL at checkout for an additional 12% off your order!! Happy shopping!
Geometric Rug Favorites-


#1- Bogtong Area Rug // #2-Agoo Area Rug // #3-Malilinao Area Rug // #4-Amaga Area Rug //
#5-Maulawin Area Rug // #6-Ampusungan Area Rug // #7-Cabarroguis Area Rug // #8-Borbon Area Rug //
Shop This Room


Leave a Reply